September 26, 2023
How to configure Header and Footer of your Website?
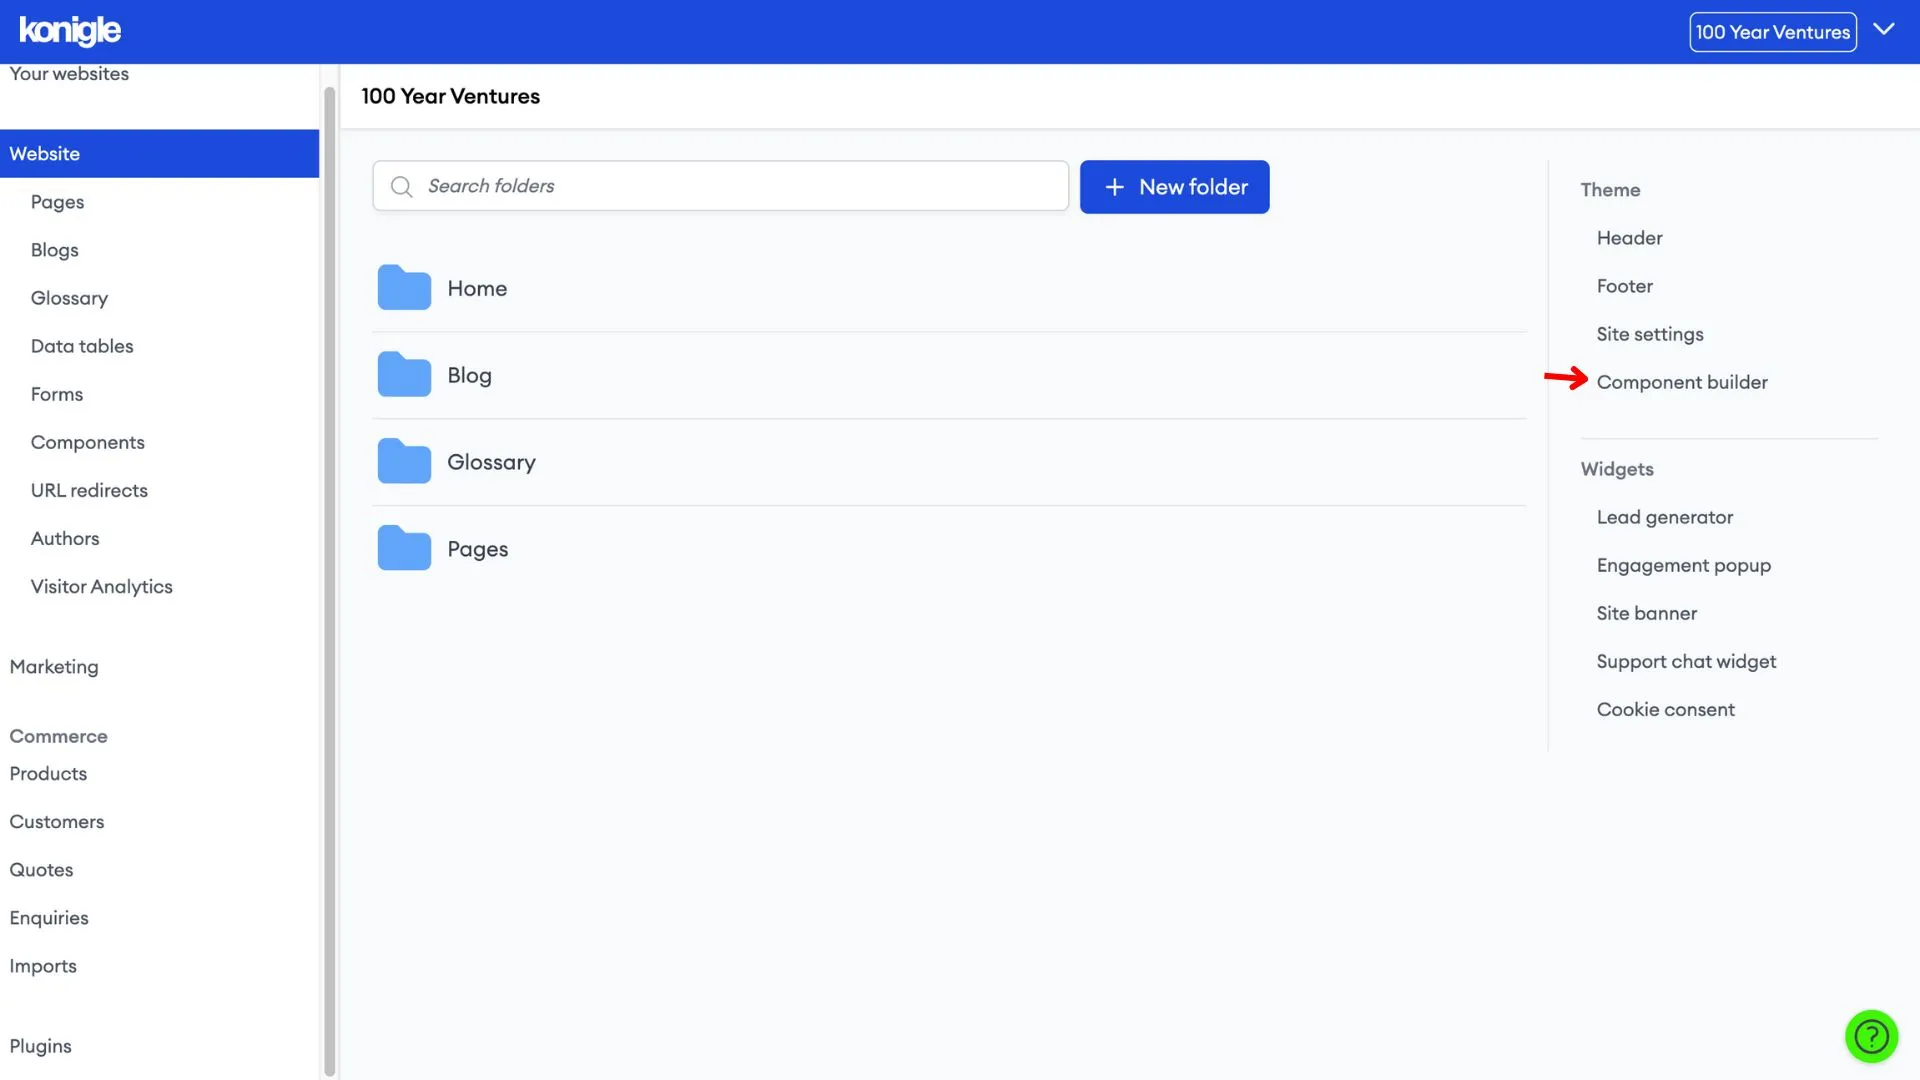
Access the Component Builder
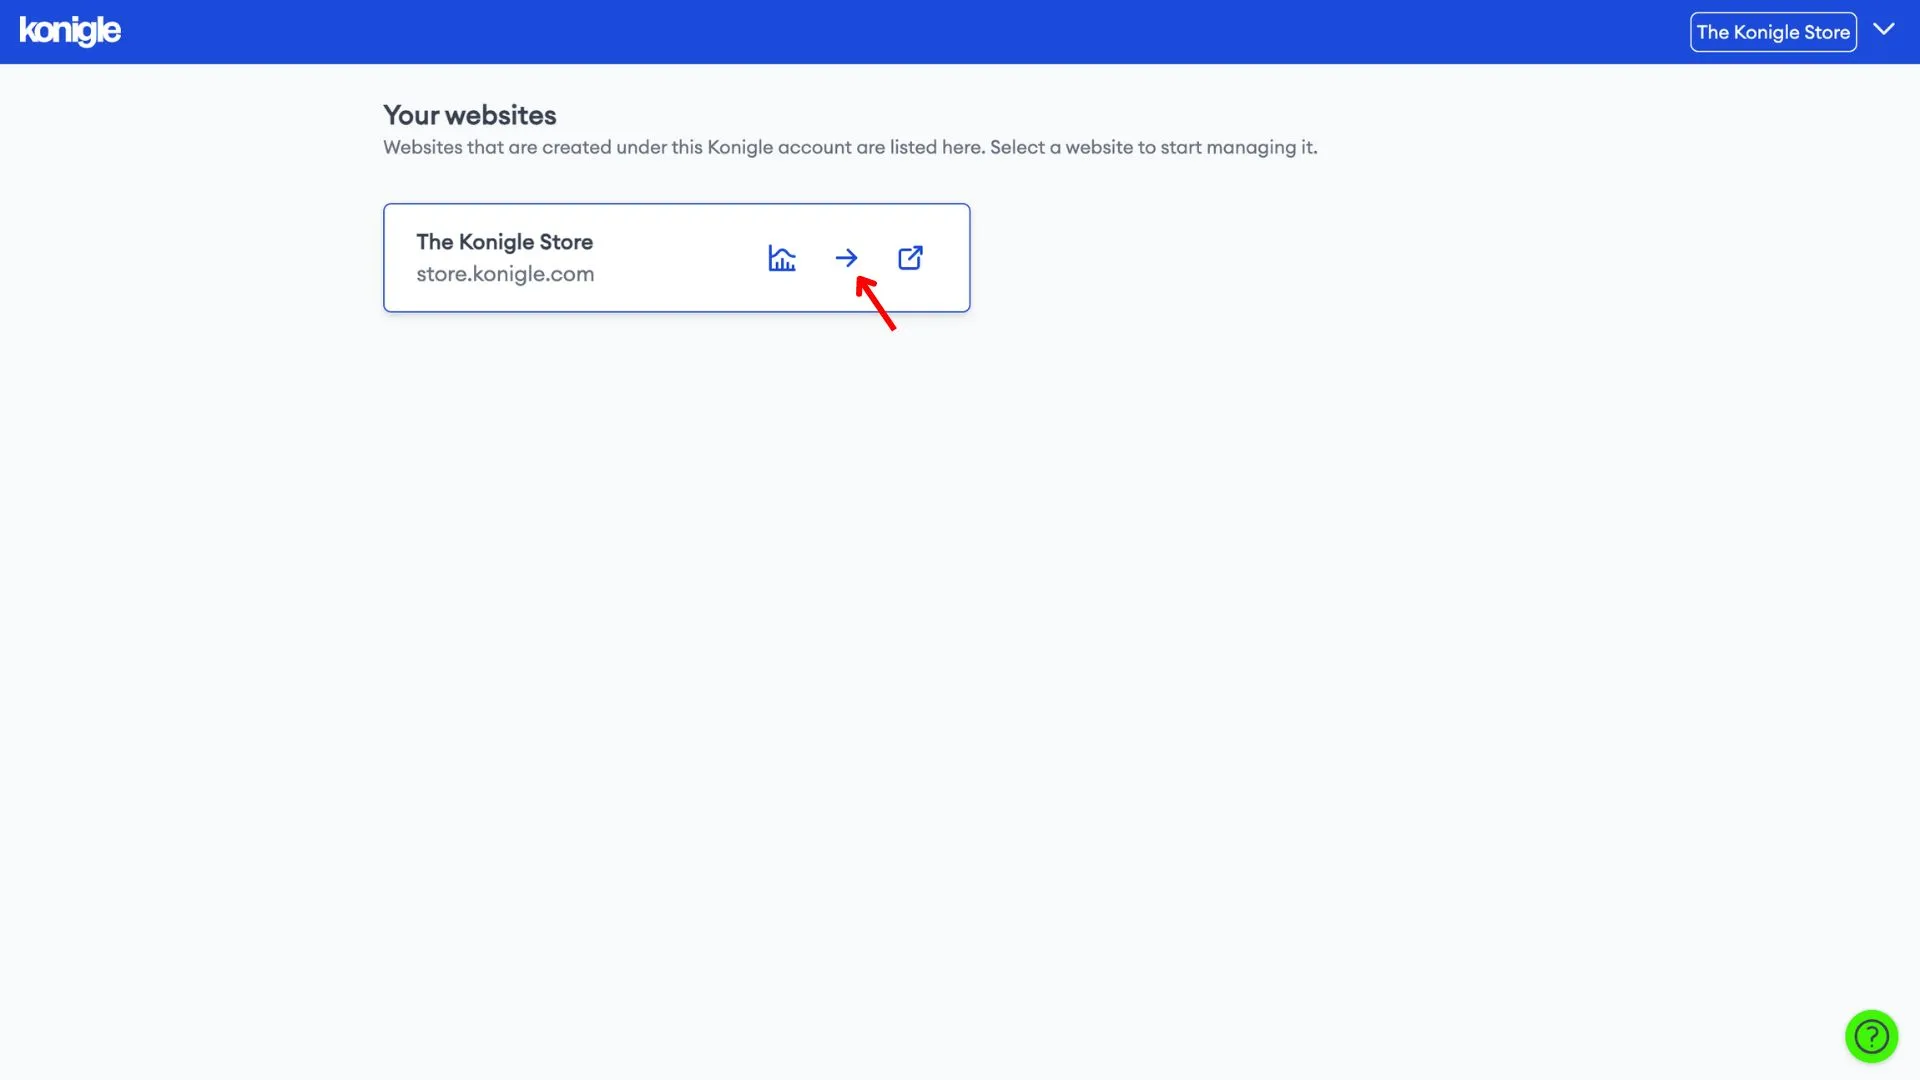
1. Select the website you wish to edit and go to the Component Builder.
Learn all about the Component Builder here
Create a header and footer for your website
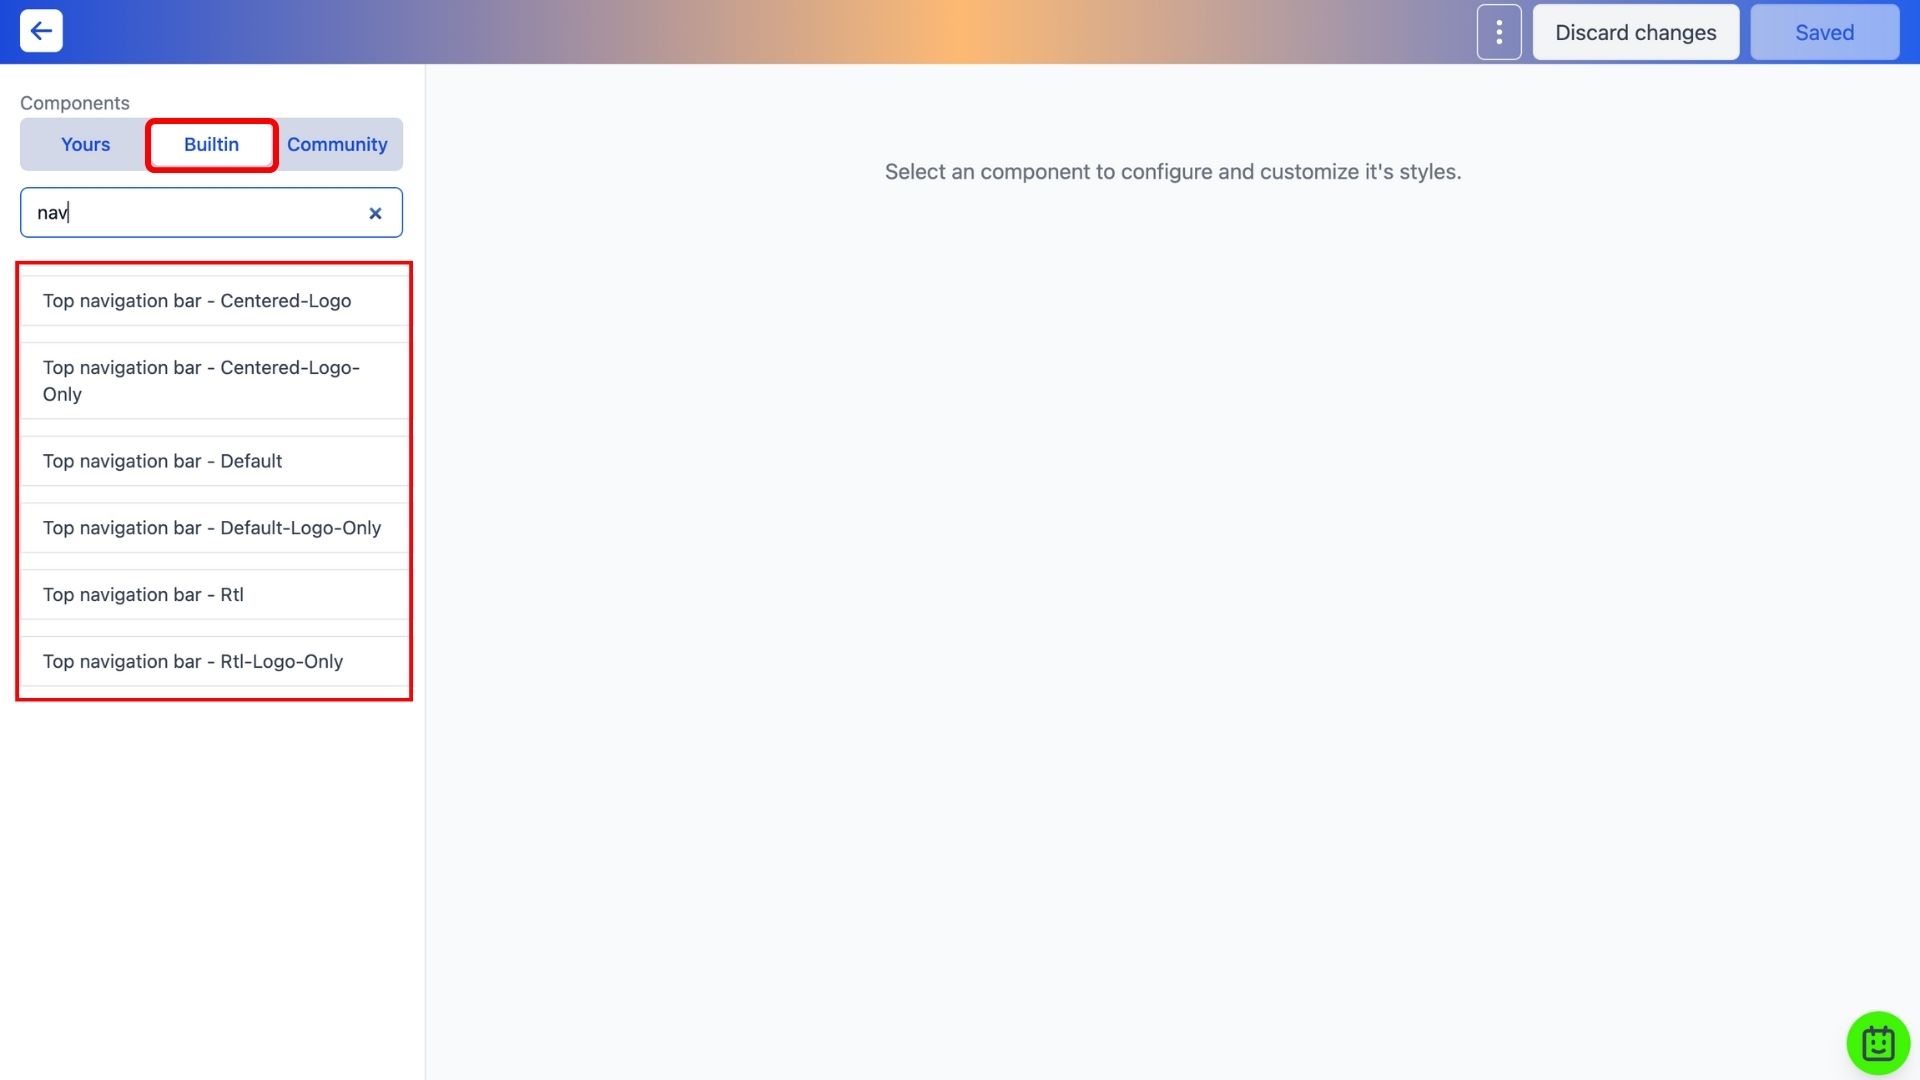
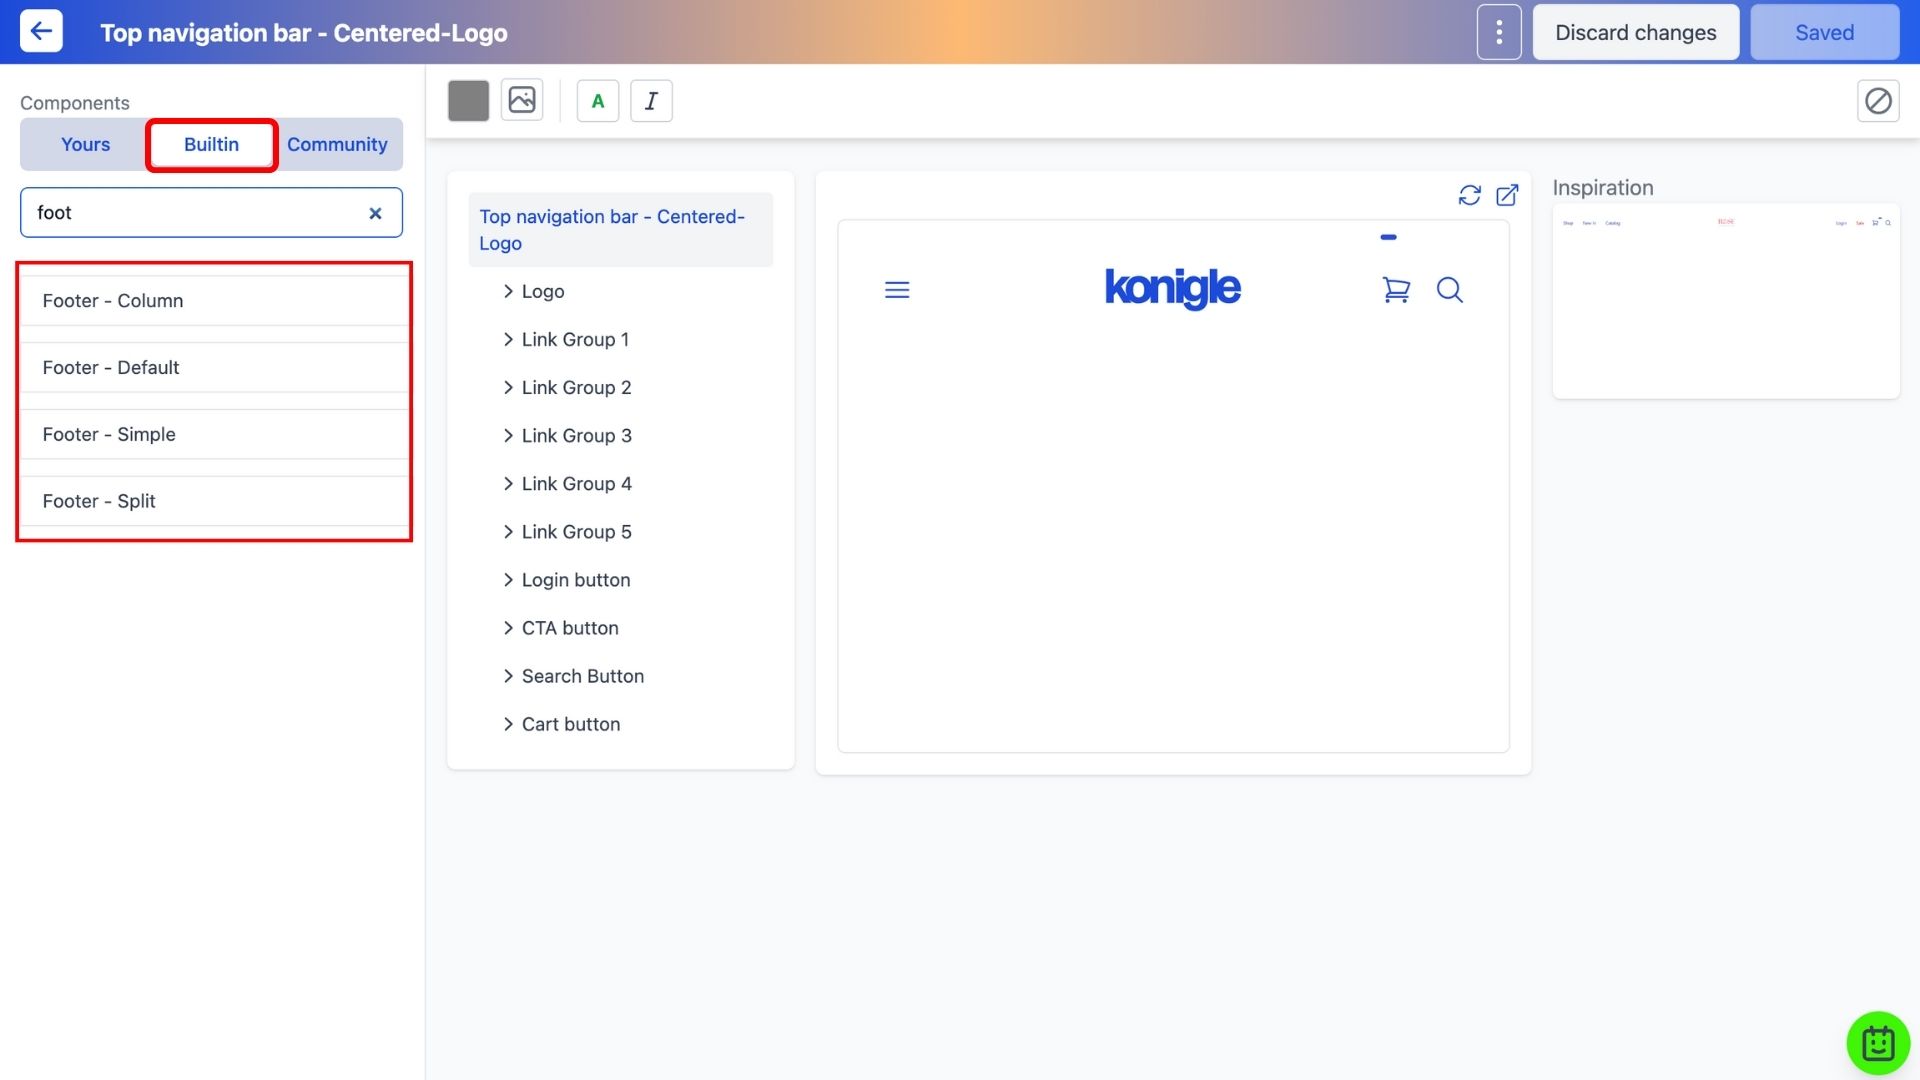
1. In the Component Builder, go to the Built-in tab and search for Navigation bar. Browse through the various styles available.
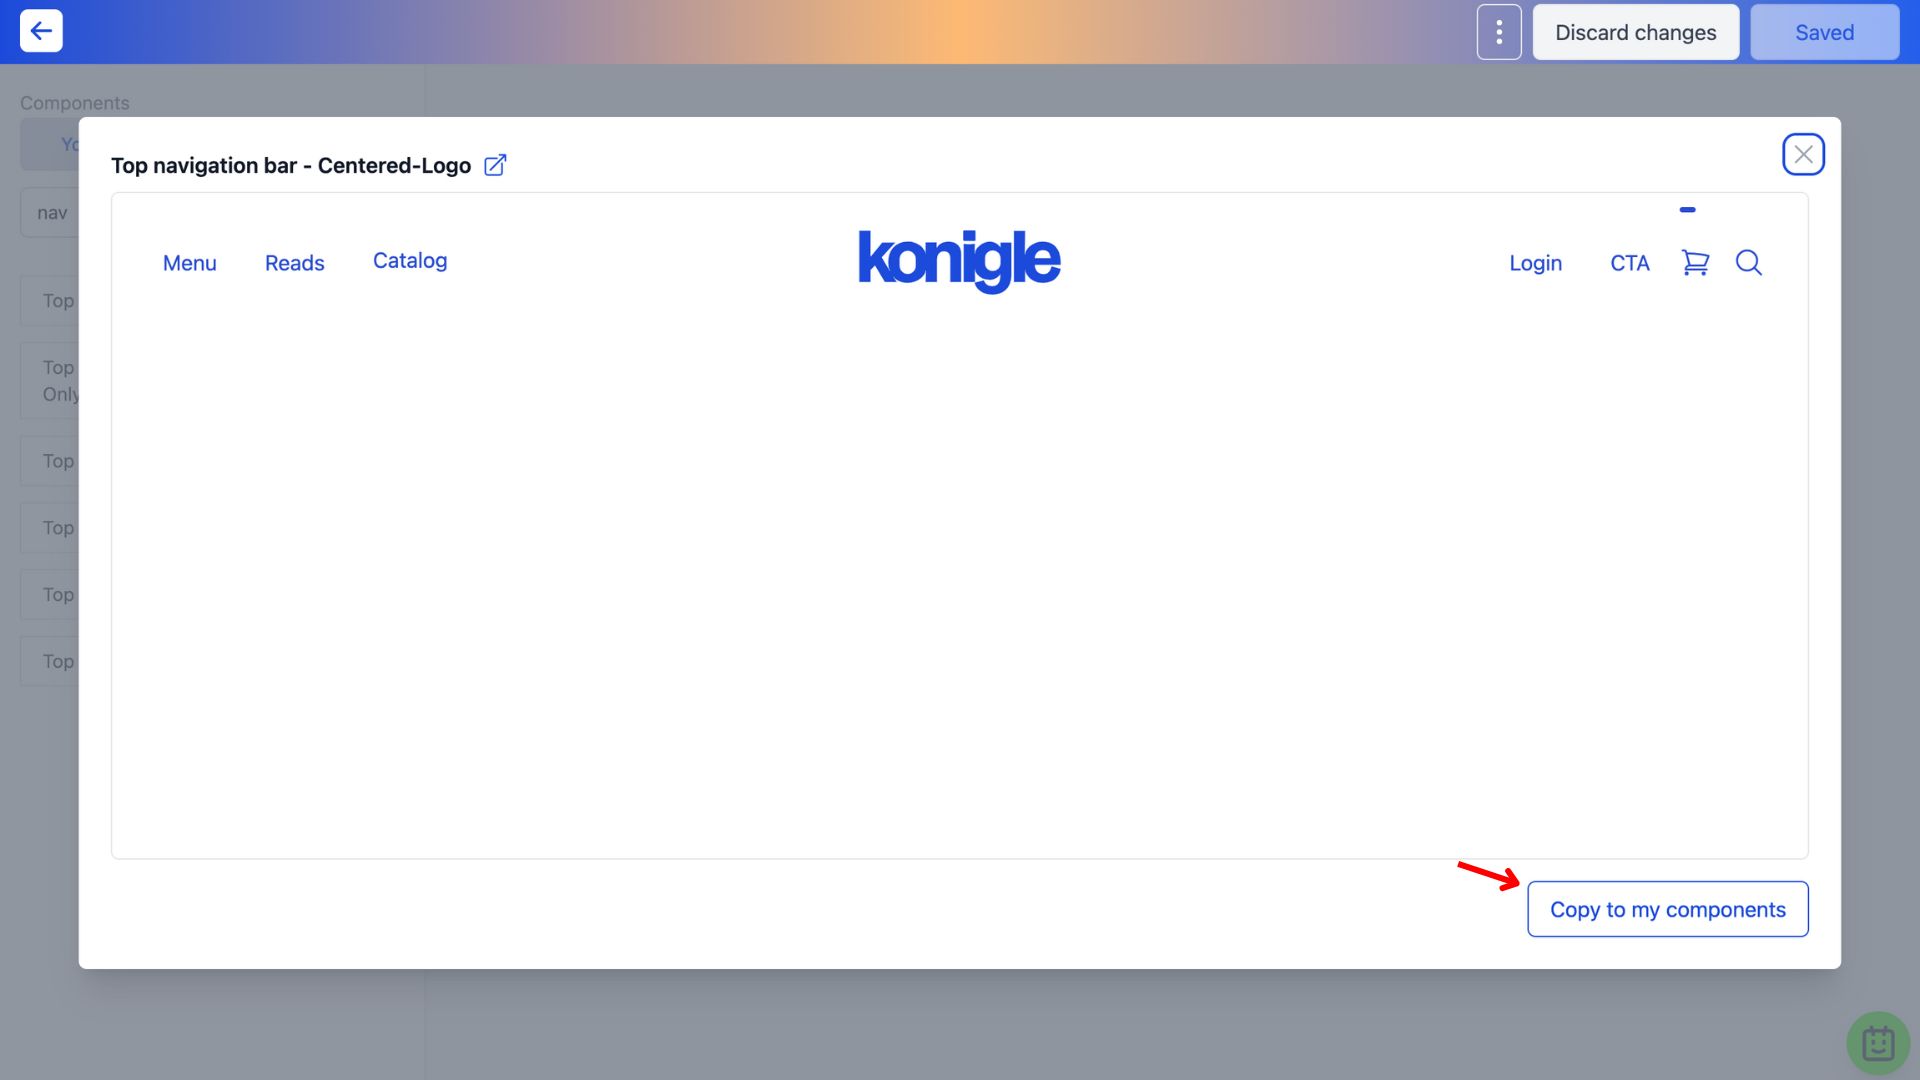
2. Copy the Top Navigation Bar of your choice to your components.
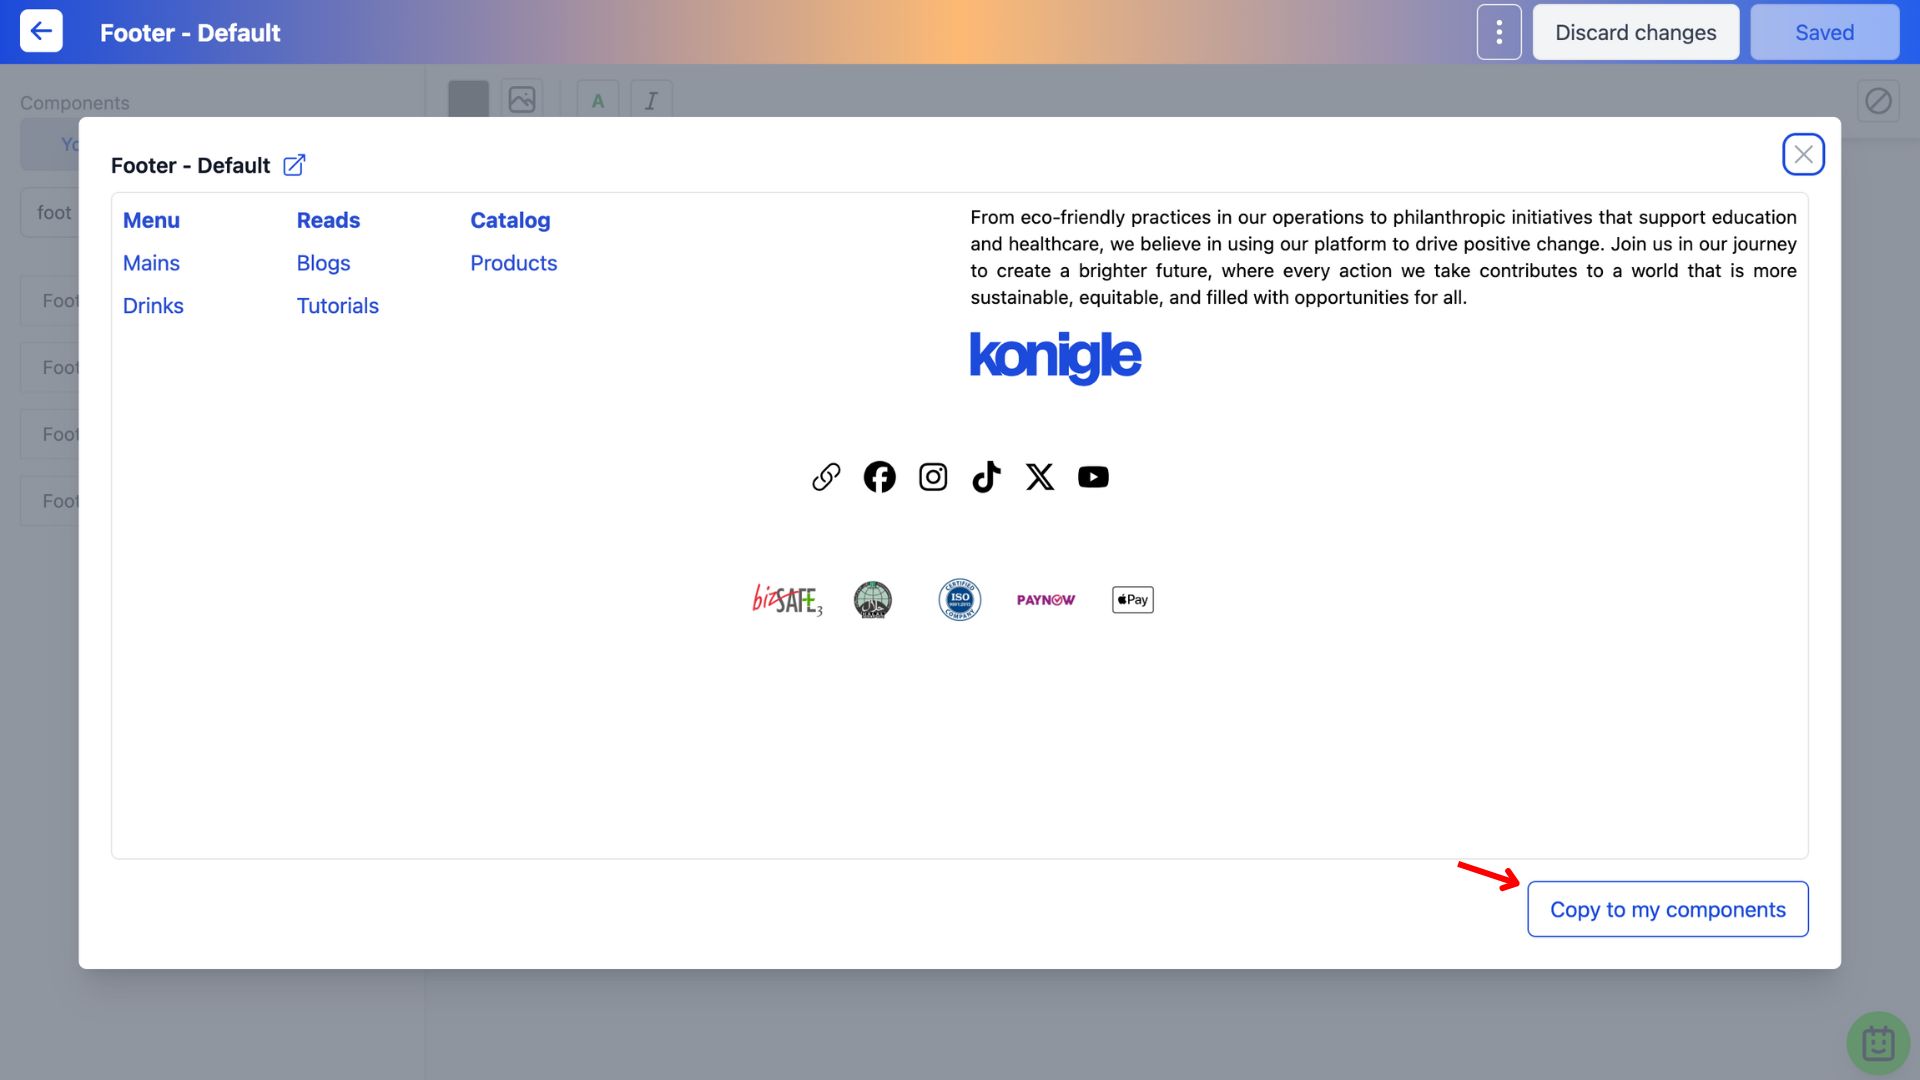
3. Then, search for Footer and browse through the various styles available.
4. Copy the Footer of your choice to your components.
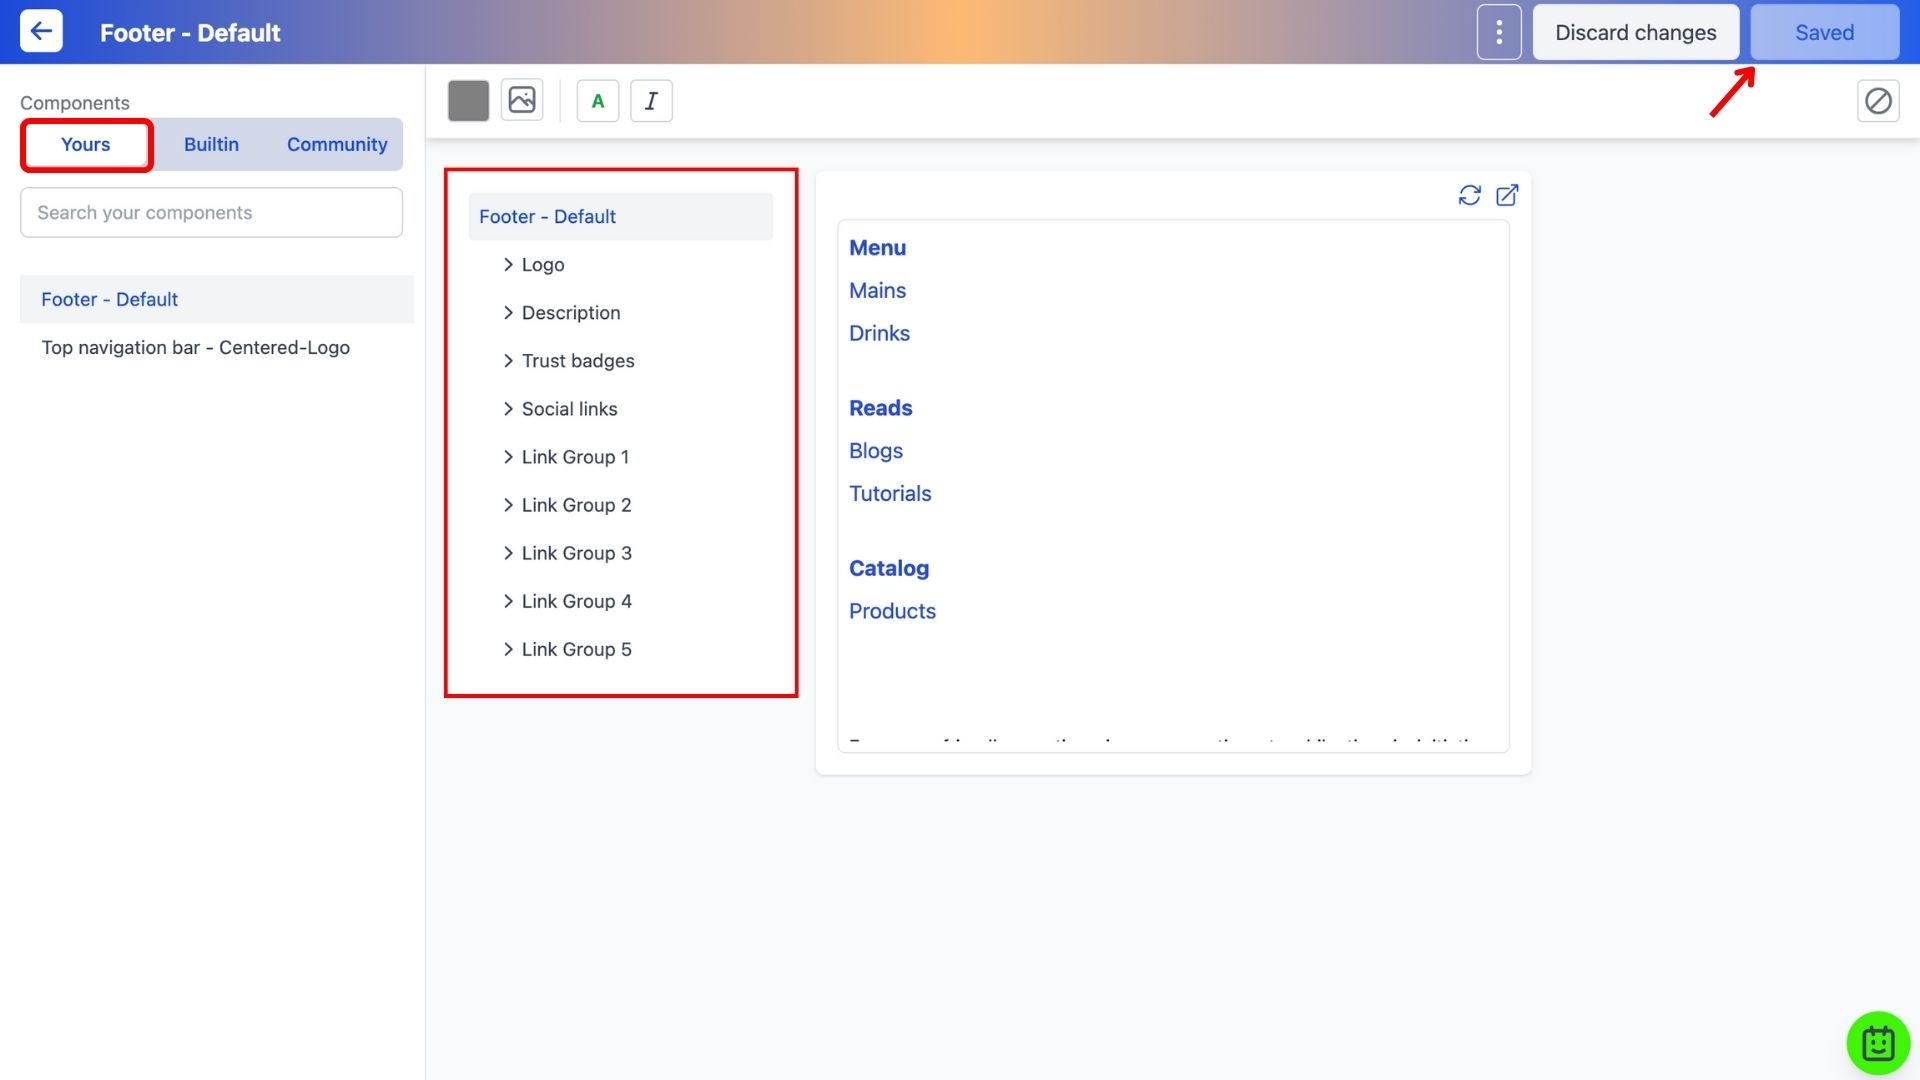
5. Go to the Yours tab to edit the copied components. Save to finalise after changes have been made to each component.
Add a header to your website
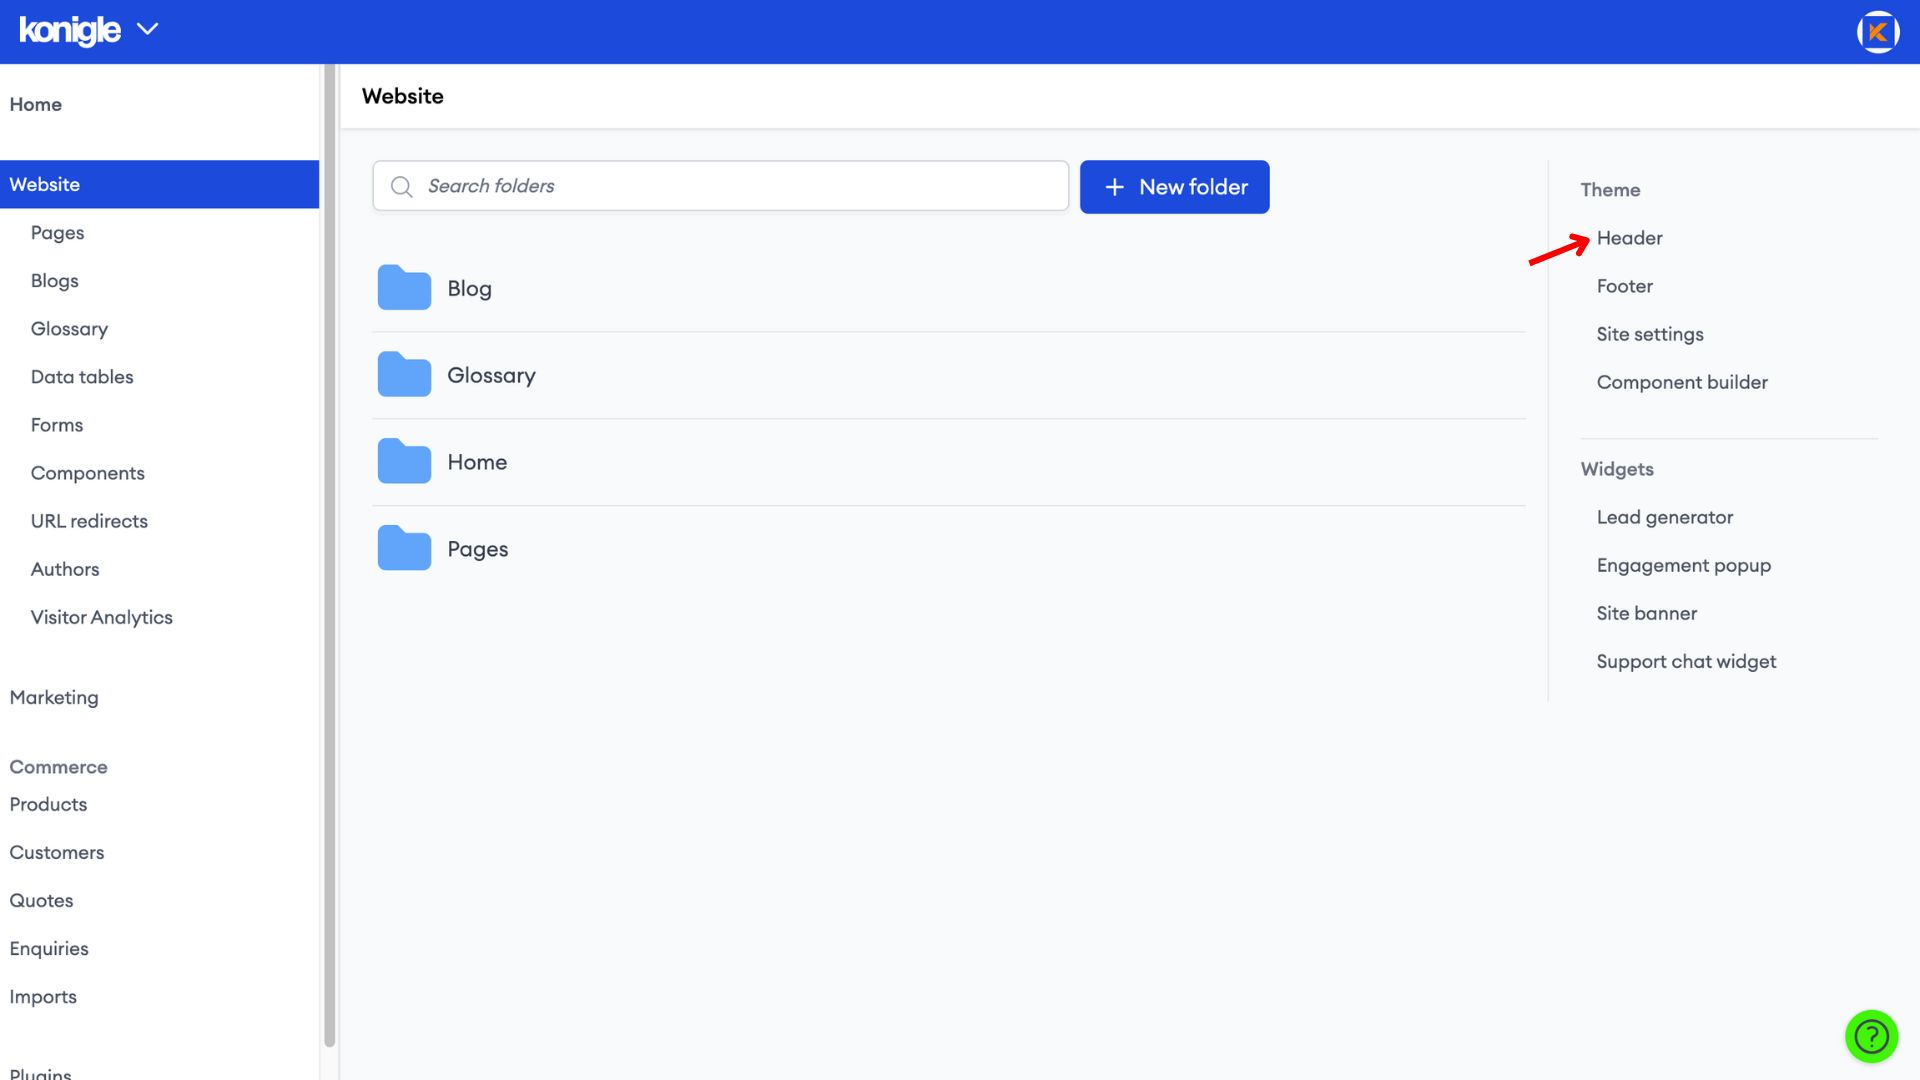
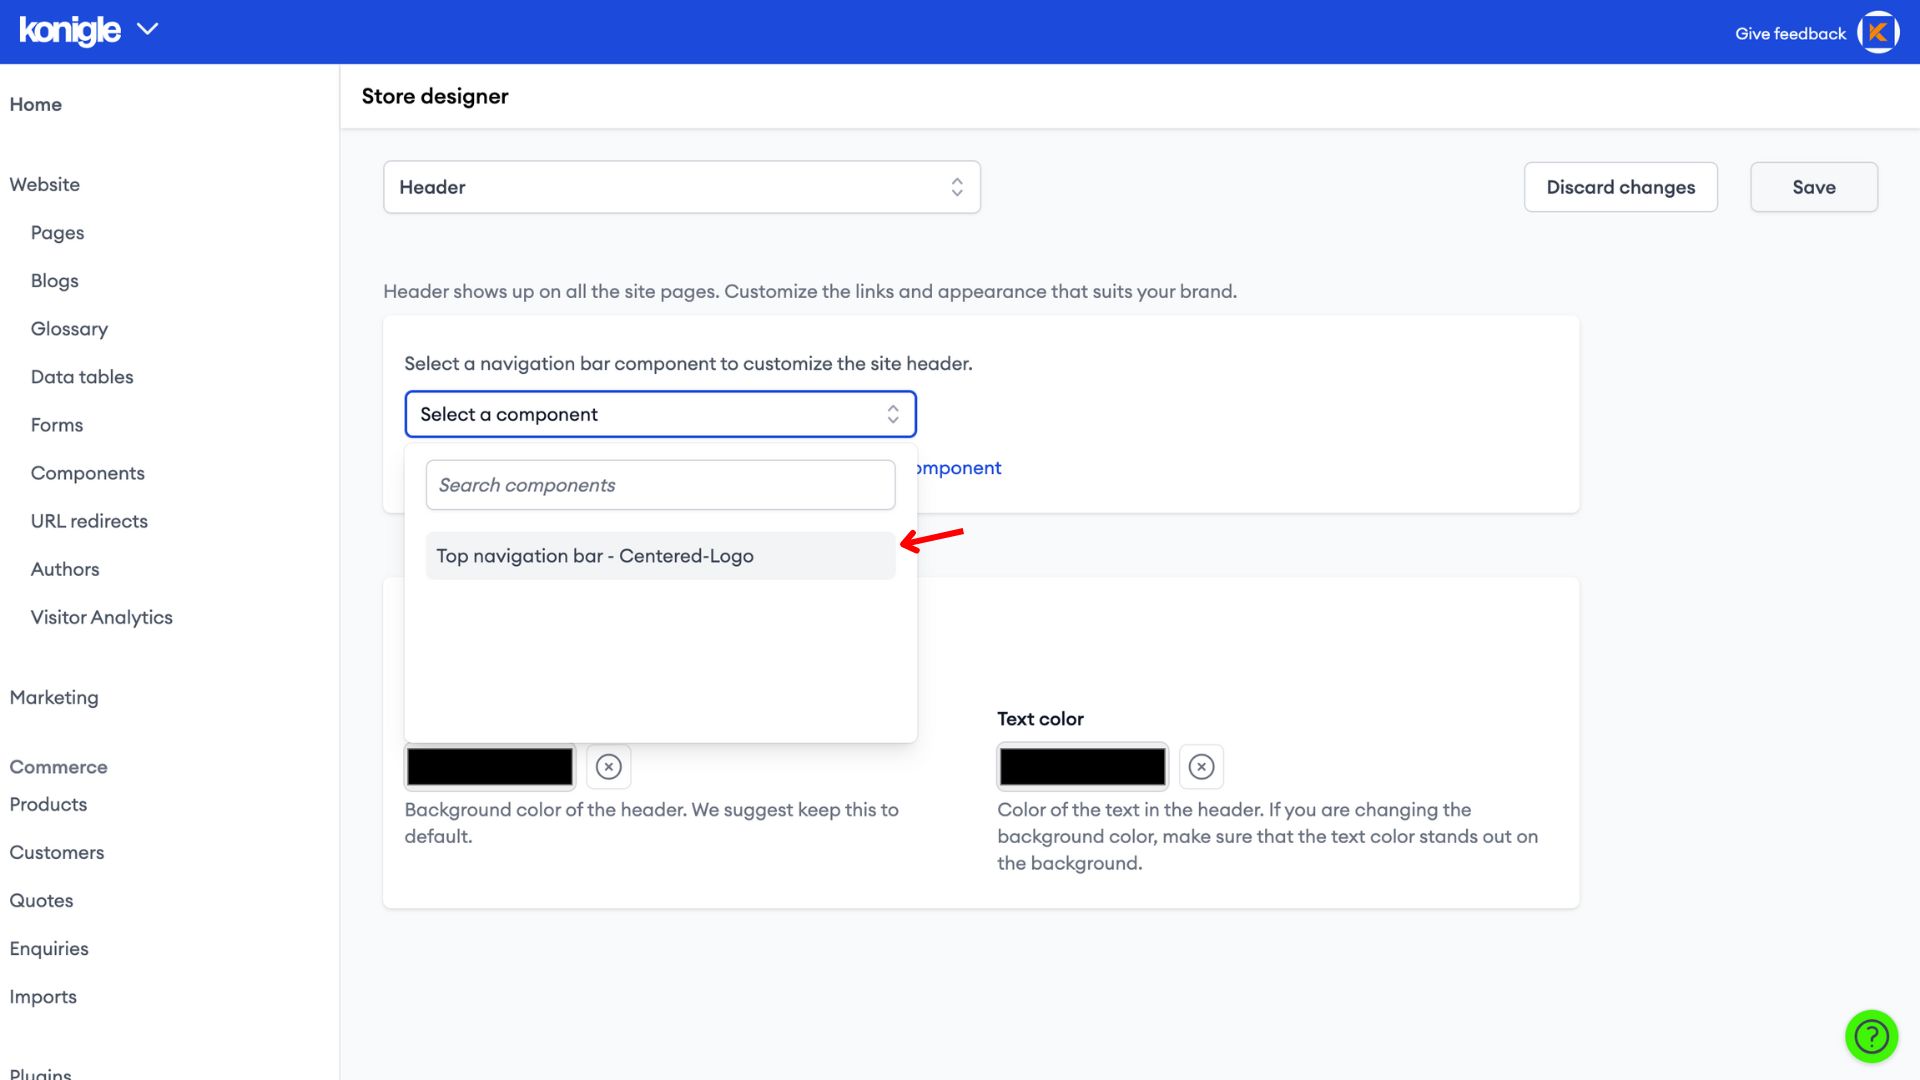
1. Exit the Component Builder and go to Header.
2. Select the Navigation bar component you have just built.
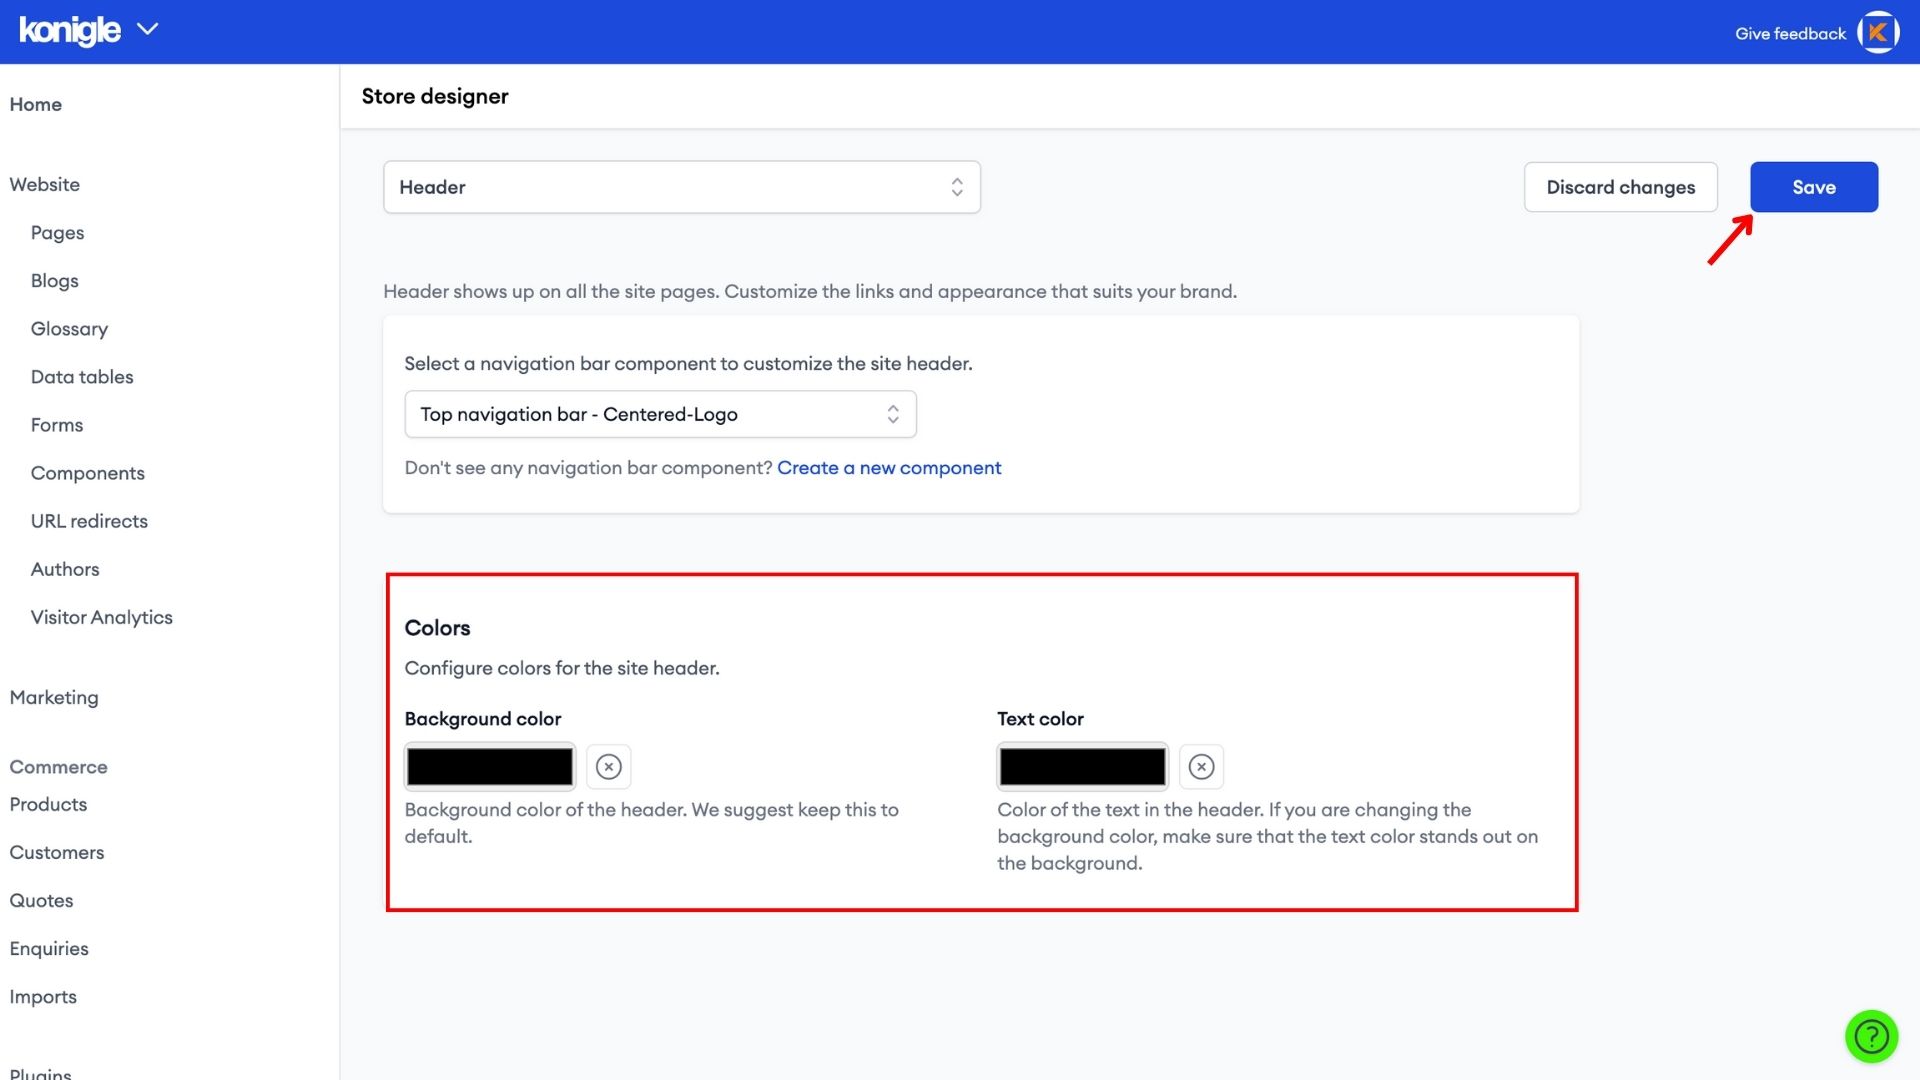
3. Configure the Background colour and text colour before saving.
Add a footer to your website
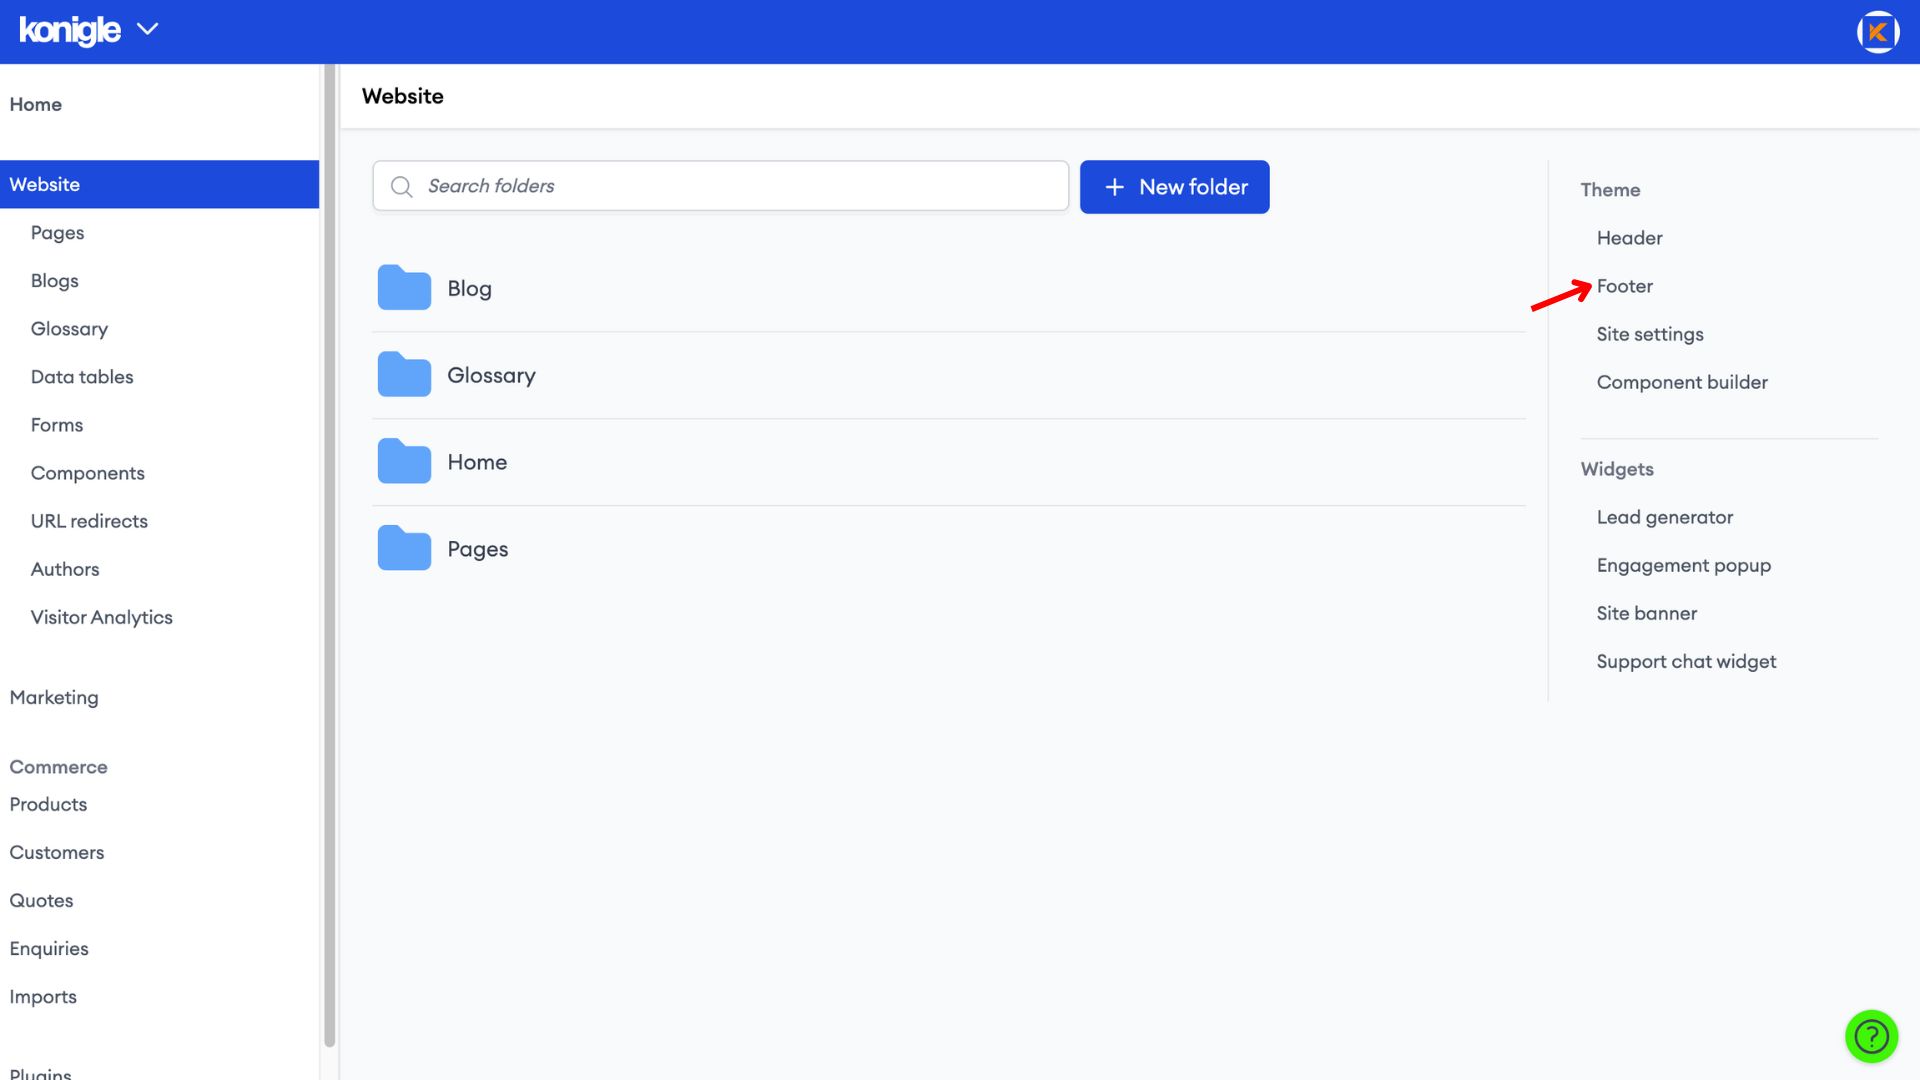
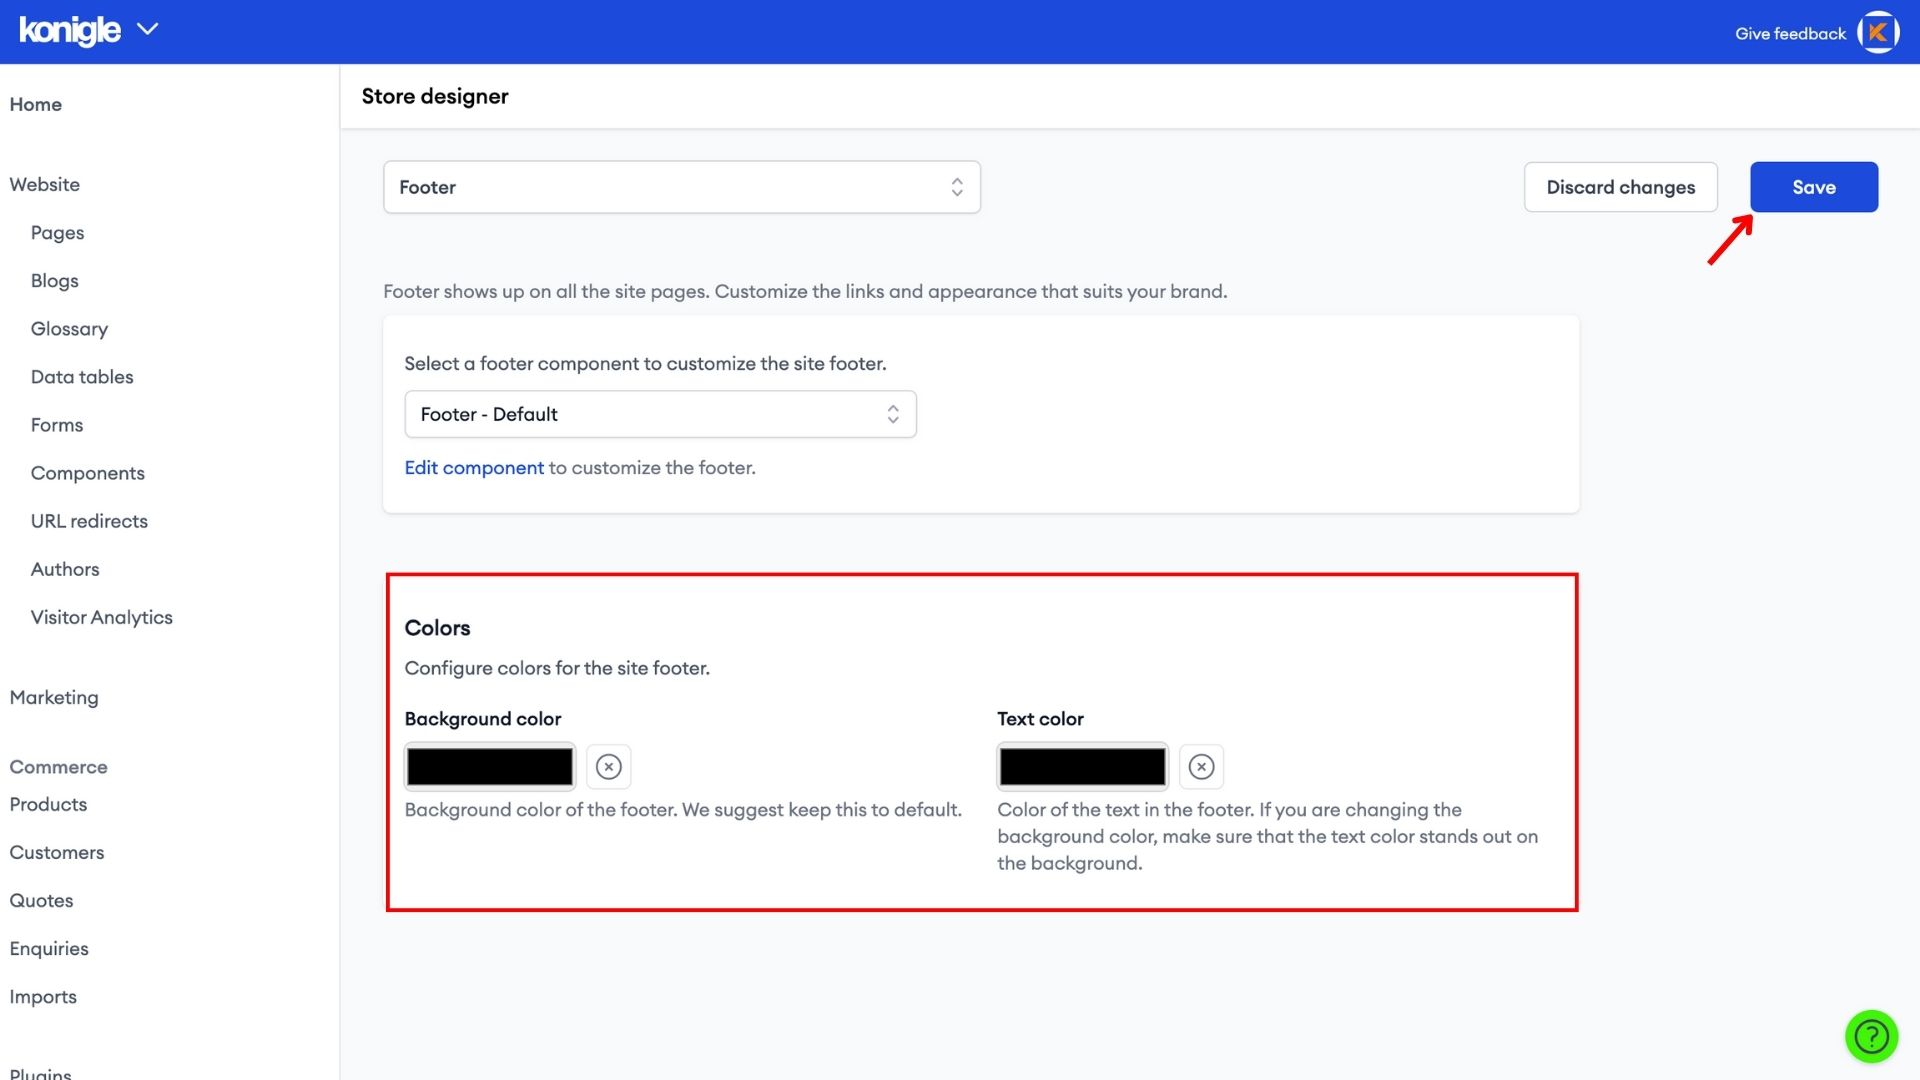
1. Next, go to Footer.
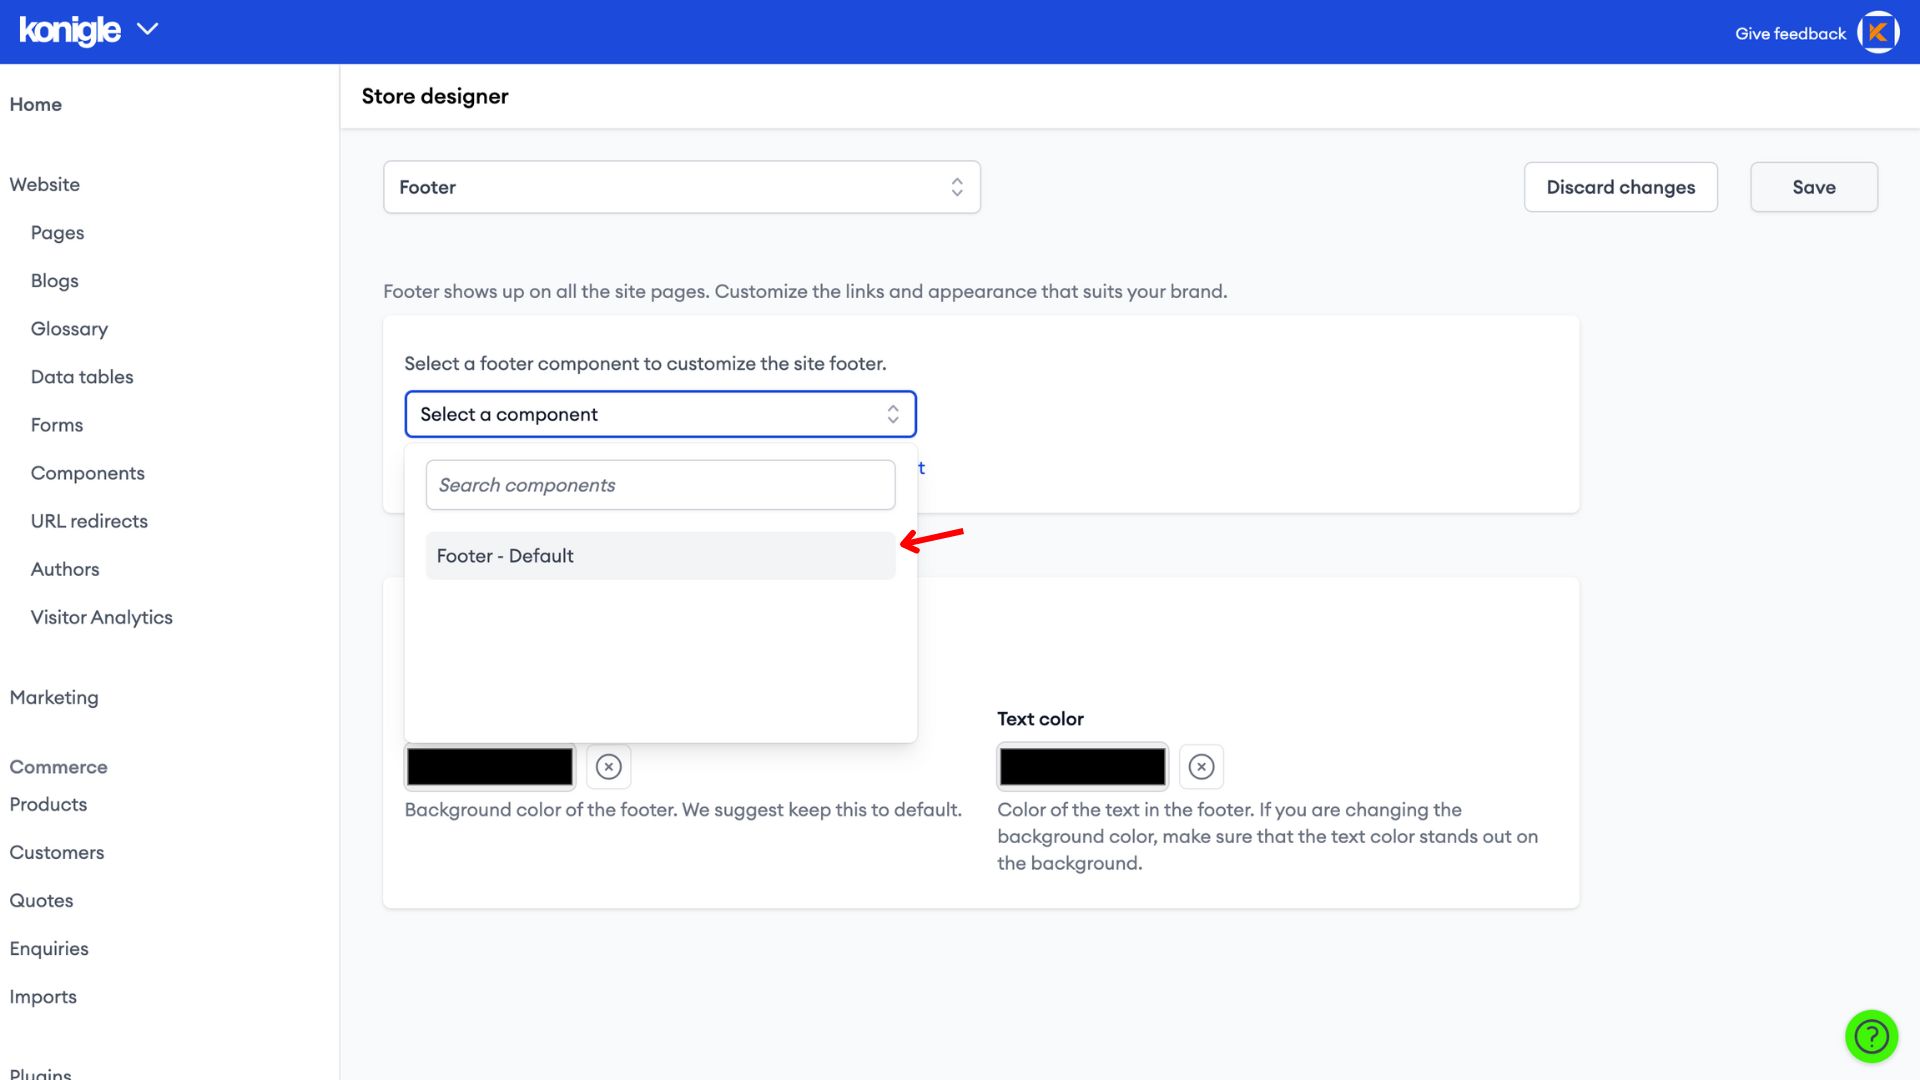
2. Select the Footer component you have just built.
3. Configure the Background colour and text colour before saving.
4. Make sure that the colours of your Header and Footer match the colours selected in the Component Builder.
Frequently Asked Questions (FAQs)
What should a header contain?
A website header typically contains a logo, website name, navigation menu, search bar, and call to action (CTA).
What is the top banner of a website called?
While sometimes used interchangeably, there's a slight distinction between header and banner.
A header refers to the entire section at the top of a website, often containing the logo, navigation, and other elements. A banner specifically refers to a rectangular image or graphic displayed within the header, often used for promotional purposes.
Do I need a footer on my website?
Similar to the header, a website footer is not strictly mandatory but highly recommended. A footer can be valuable in providing contact information, copyright notices, additional navigation, socials, and trust badges.

